Before the match starts
Go through these points well in advance of the match. The most important thing is to ensure that the scoreboard, control tablet, media, and sound are working before the game starts.
Prepare the system
- Ensure the control tablet is charged and running.
- Check that the connection indicator is green.
- Choose the correct species from the species selection.
- Create a match or open the required match view.
- Transfer team names, logos and other media from the USB stick.
Test before playing
- Check that the team names and logos are displayed correctly on the scoreboard.
- Test the game clock, points, and other sport-specific buttons.
- Test advertisements, videos and other display media.
- Ensure that the buzzer, sounds, and announcements are audible from the stadium's sound system.
- If you are using an HDMI source, check that the image is displayed and then return the source back to the input board after testing.
The sounds are important to test beforehand
Sound issues are often only noticed when the match starts. Test the buzzer, videos, and any announcements beforehand.
Sports-specific instructions
Select the species to be used. Species-specific guidance includes match creation, clock, scoring, and use of special functions.
Media preparation
Images, videos, sounds and team names are imported into the system from a USB stick. Use clear file names and test the content before the match.
Supported file formats
| Contents | Shape |
|---|---|
| Pictures | .jpg, .jpeg, .png |
| Video | .mp4 |
| Sounds | .mp3, .wav |
| Team name | nimi.txt |
Clothing recommendations
| Usage | Recommendation |
|---|---|
| Main display | 576 × 340 px |
| Advertisement or video | Maximum 1920 × 1080 px |
| Logo | At least 400 × 400 px |
| Video bitrate | Maximum 5000 kbps |
USB drive folder structure
Create a folder at the root of the USB stick dsbController. The system reads media files from under this folder.
dsbController/
├── ad/
│   ├── advertisement_1.png
│   └── advertisement_video.mp4
├── goal/
│   └── goal.mp4
├── guest/
│   ├── guest.png
│   └── name.txt
├── home/
│   ├── home.png
│   ├── name.txt
│   └── javelin.txt
└── media/
    ├── intro.mp4
    ├── horn.mp3
    └── announcement.wav
ad
Advertising images and videos to be shown during the match.
goal
Manually startable in case of power failure .mp4-video.
home
The home team's logo, name, and if necessary, the javelin throw roll of honour.
guest
Away team logo and name.
media
Manually displayable images, videos, sounds, and custom buzzer sound.
Sample files
Replace model names with your own logos, advertisements, videos, and sounds. Retain mandatory names such as home.png, guest.png, nimi.txt and horn.mp3.
Mandatory and recommended filenames
Home team logohome.png, home.jpg or home.jpeg
Away team logoguest.png, guest.jpg or guest.jpeg
Team namenimi.txt, the first line will be displayed as the team name.
My buzzerhorn.mp3 to the folder media.
Advertisements and videos
Use clear filenames without special characters.
Using an HDMI source
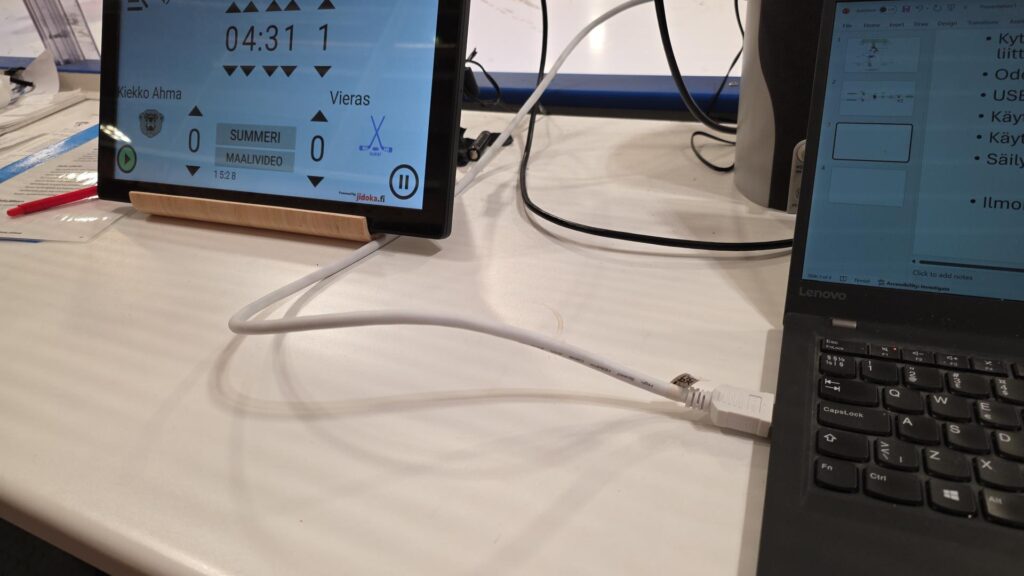
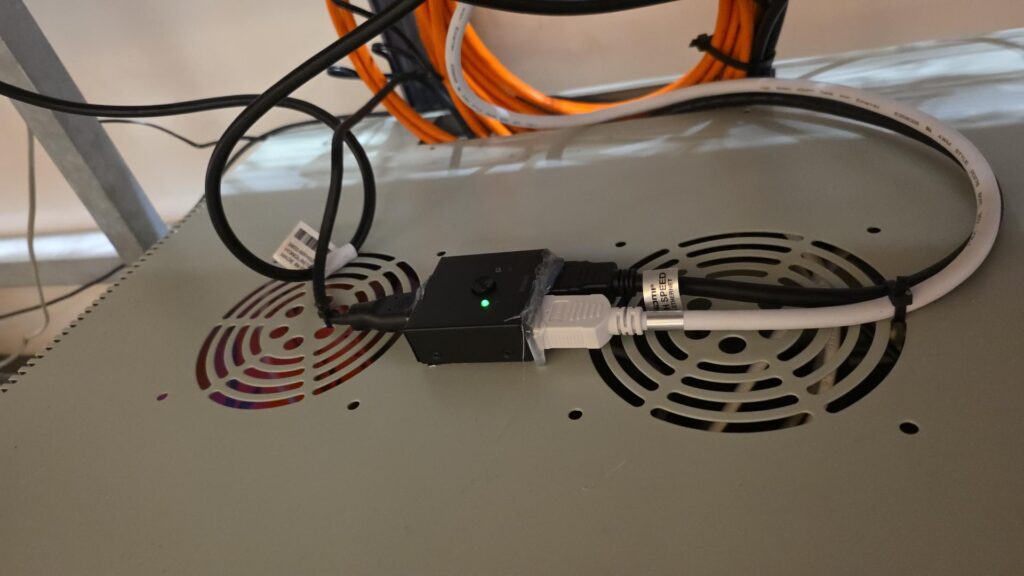
An HDMI switch allows you to display an image from a laptop, for example, on ascoreboard.
Deployment
- Connect your device to the white HDMI cable.
- Ensure the device is outputting to HDMI.
- Press the HDMI switch select button.
- Please check that your own image source is displayed on the scoreboard.
End of use
- Press the HDMI switcher's selection button again.
- Ensure the scoreboard system image is displayed on the screen.
- Disconnect your HDMI device from the white cable.
Important
Always return the HDMI source to the scoreboard system after the event.
Problem situations
Start with the symptom and go through the steps in order.
Connection to the scoreboard is not working
- Check the connectivity indicator in the top-right corner of the control tablet.
- If the indicator light is red, restart the control tablet.
- Check that the control tablet is online.
The system is not responding, even though the connection indicator is green.
- Open the top-left menu.
- Select Start the system.
- Please wait approximately 2 minutes and test the system again.
The screen is on, but the picture is black
- Check the HDMI switch.
- Ensure the correct HDMI input is selected on the projection screen system.
- Switch source using the button on the HDMI switcher if necessary.
The sound is not working
- Check the XLR cable from the results board control cabinet to the stadium sound system.
- Check the system's audio settings.
- Test the sound with another media file.
Contact support
If the problem is not solved by the instructions, please include the location, category, date, time, description of the problem, and information on what troubleshooting has already been attempted in your support request.